Segment Salesforce Deals by Size and Flag Statistical Outliers
Loading and transforming Salesforce Opportunity data into Snowflake
The problem: bucket deals by size and flag outliers
A $900K opportunity sitting alongside twenty $30K deals skews the pipeline mean and makes forecasts unreliable. To catch this, you need Salesforce Opportunity data in a warehouse — segmented by deal size, with statistical outliers flagged — updated on a schedule, not as a one-off CSV export. This pipeline produces two outputs:
Tier distribution
Group every deal into one of three size buckets and show deal count and share of total pipeline revenue per tier.
| Tier | Deal Count | Tier Revenue | % of Total Revenue |
|---|---|---|---|
| Under $50K | 142 | $3,373,200 | 18.0% |
| $50K–$200K | 89 | $8,452,600 | 45.1% |
| Over $200K | 23 | $6,914,200 | 36.9% |
How does Salesforce authentication work for data extraction?
Salesforce uses OAuth 2.0. You register a Connected App in Salesforce Setup, grant it the api scope (plus refresh_token and offline_access for unattended runs), and pick a grant flow. For a background pipeline that runs on a schedule, the JWT Bearer flow is the standard choice because it needs no interactive login and no stored password.
Outlier detection (Amount > mean + 2σ)
Flag individual deals whose Amount is more than two standard deviations above the mean — in this dataset, that threshold is $370,100. Those deals distort averages and need separate handling in forecasting models.
| Opportunity | Amount | Stage | Close Date | σ above mean |
|---|---|---|---|---|
| ACME Corp — Enterprise Renewal | $890,000 | Closed Won | 2026-06-30 | 5.5 |
| Beta Industries — Global Expansion | $620,000 | Negotiation/Review | 2026-08-15 | 3.7 |
| Delta Co — Platform Upgrade | $415,000 | Proposal/Price Quote | 2026-09-01 | 2.3 |
To produce both outputs on a schedule, this guide uses DataStori — an agentic ELT platform that ingests Salesforce Opportunity data directly into Snowflake and runs the tier distribution and outlier detection as a versioned transformation pipeline, all without writing extraction or transformation code by hand.
Solution outline
Find the right Salesforce API
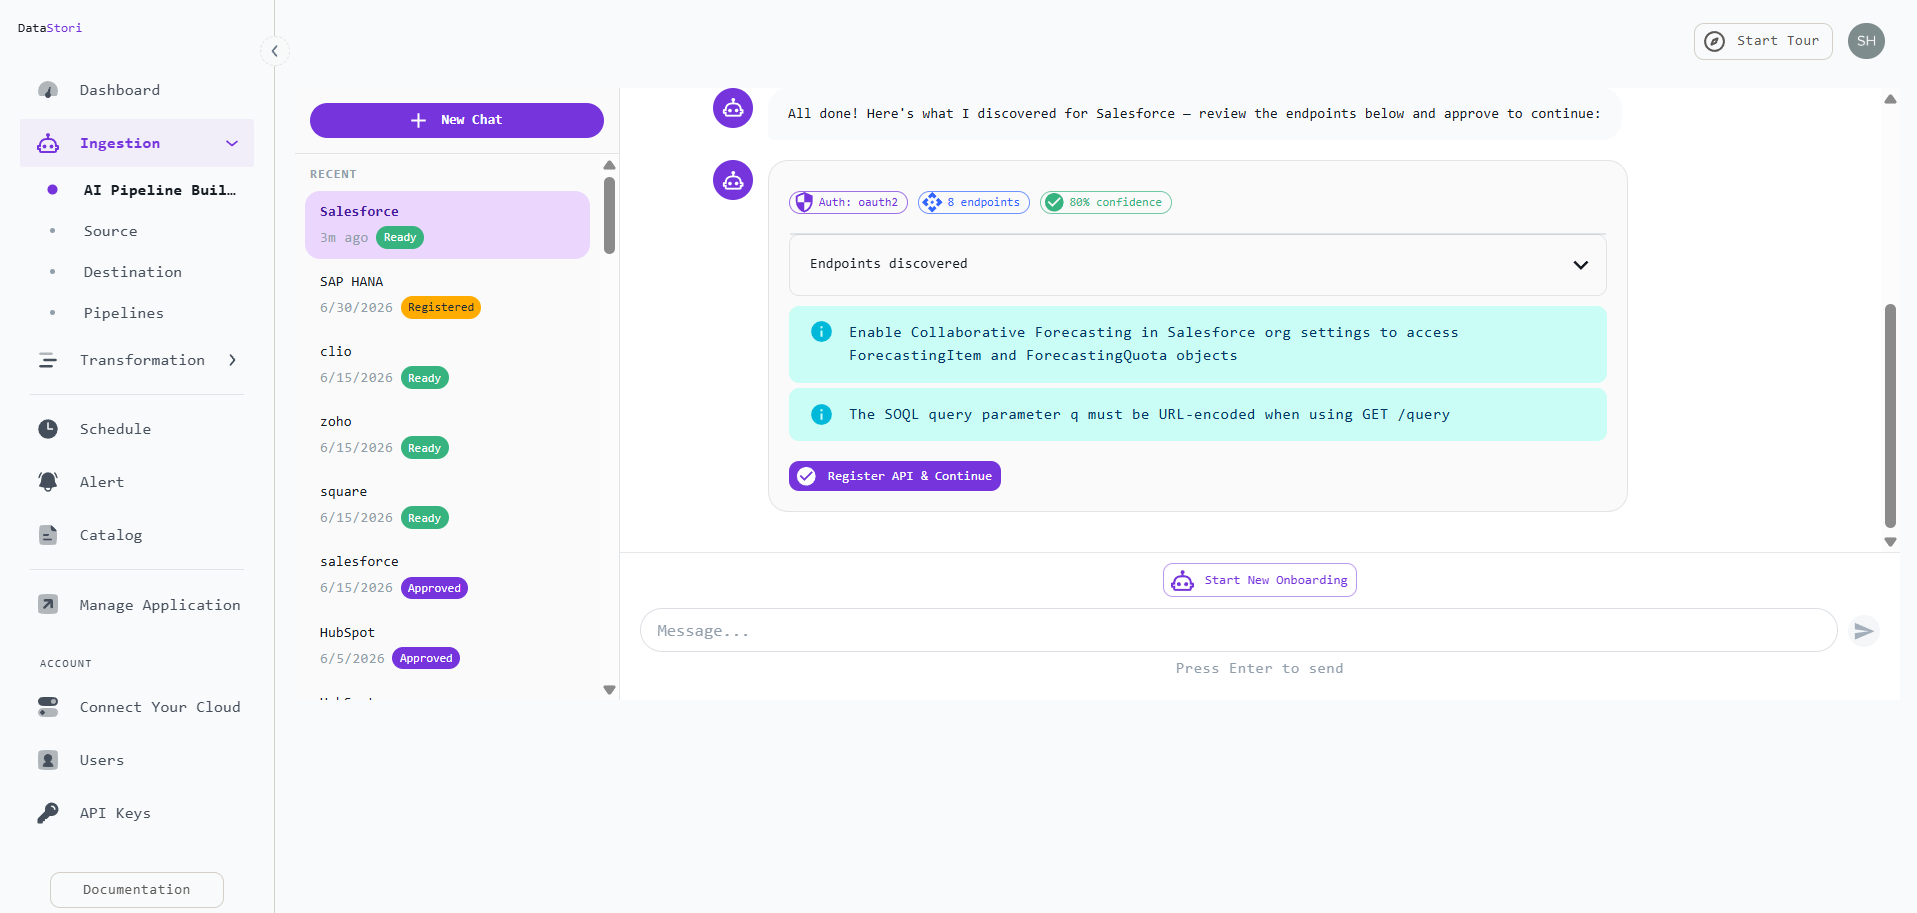
Identify which Salesforce API exposes the Opportunity data and what query parameters it requires — without reading the full API documentation by hand. DataStori reads the live Salesforce docs and surfaces the right endpoint with a confidence score.
Build and run an ingestion pipeline
Generate an incremental pipeline that fetches Opportunity records into Snowflake on a schedule — handling OAuth authentication, Bulk API pagination, and deduplication automatically, without writing pipeline code.
Document the ingested data
Catalog the field names, types, and primary keys of what was ingested so the downstream transformation has a reliable, versioned schema to work from. This happens automatically after the first pipeline run.
Run the analytics transformation
Describe the tier-bucketing and outlier-detection logic in plain language. DataStori generates the transformation script from the data catalog, registers it as a versioned pipeline, and writes the output — deal-size tiers and outlier flags — to your own cloud storage on every run.
Step 1: Finding the right Salesforce API
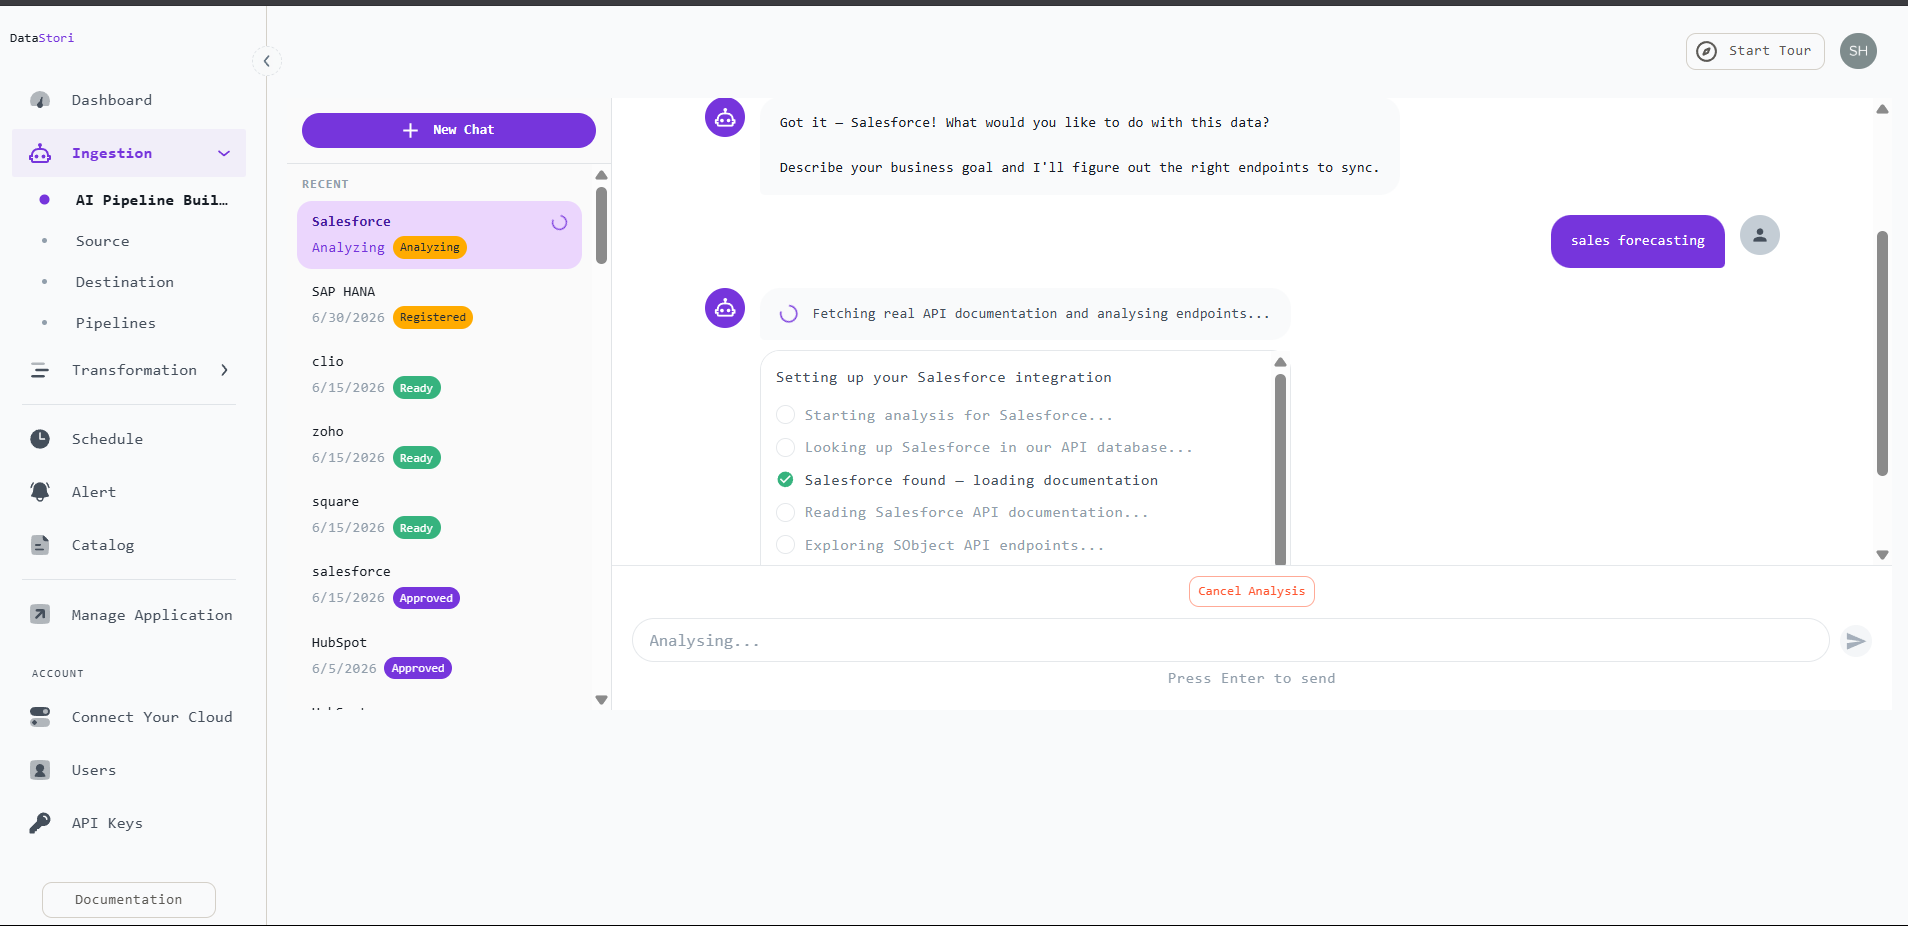
Salesforce exposes dozens of APIs and hundreds of endpoints. The one needed here is the SOQL query endpoint on the Bulk API — it accepts SQL-like queries and returns large record sets in batches. Rather than reading the Salesforce API documentation to find it, describe the goal in plain language in DataStori's AI Pipeline Builder and let it identify the right endpoint automatically, reading the live Salesforce API docs and returning each candidate with a confidence score.
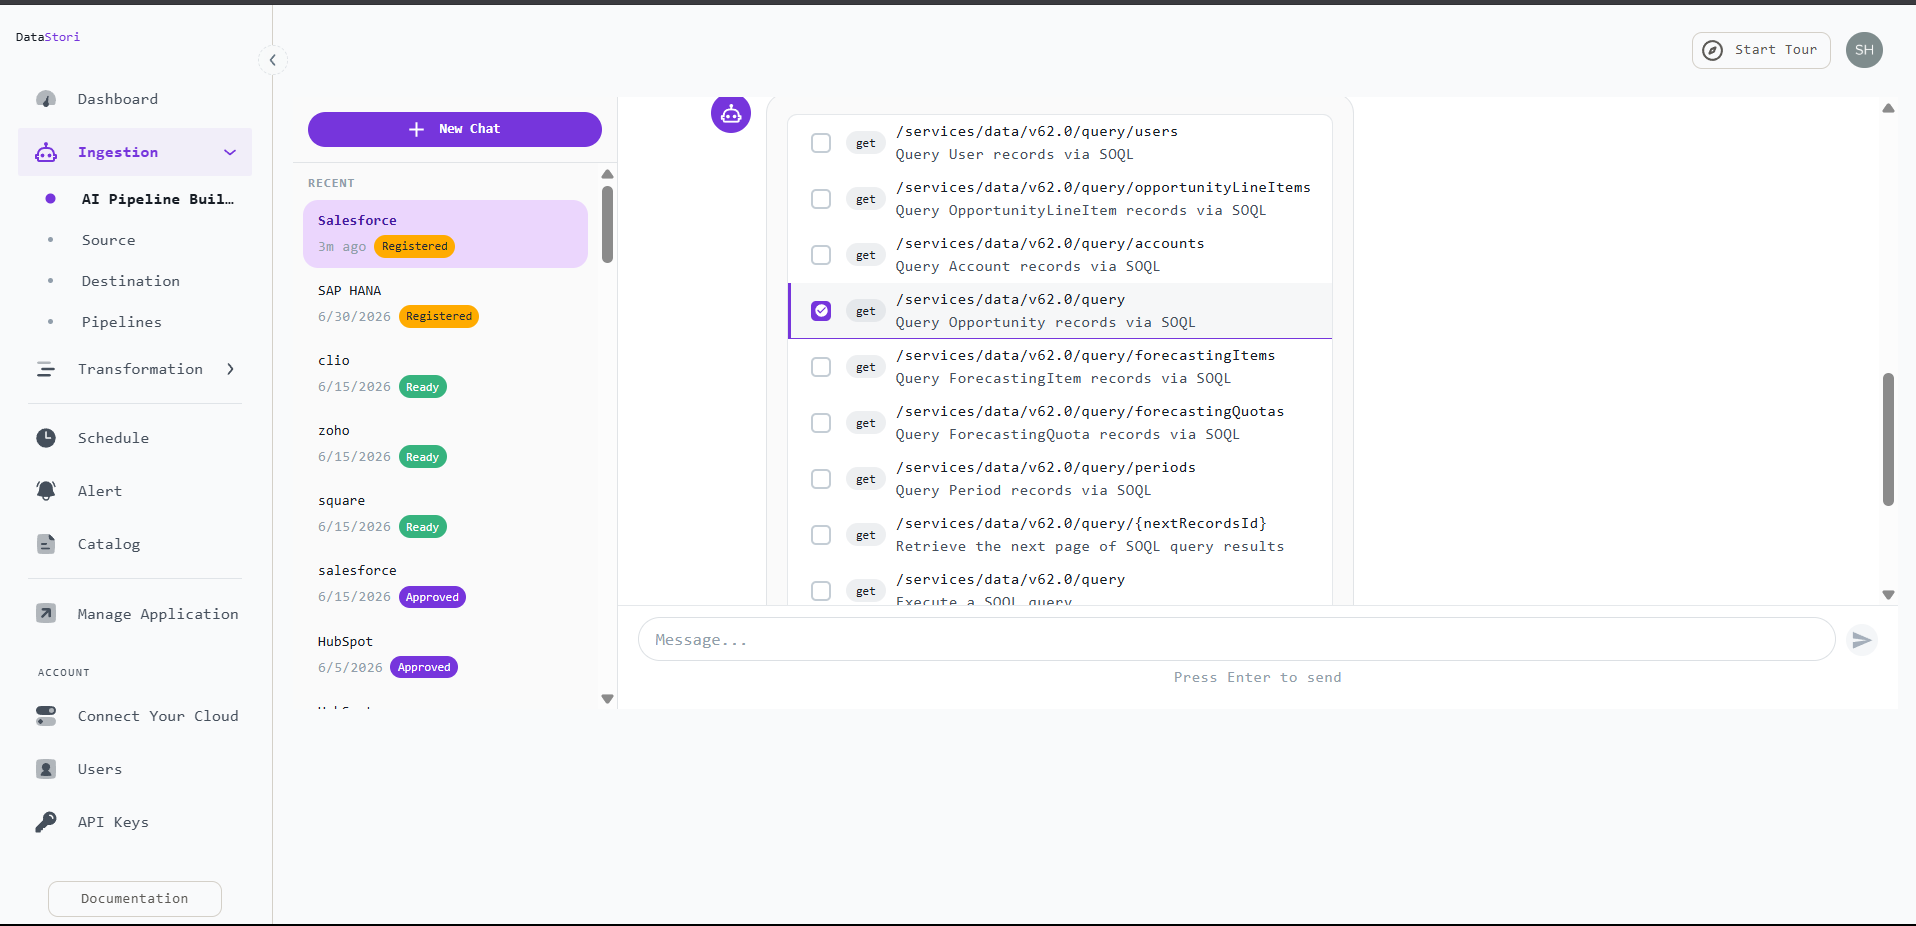
Select the SOQL query endpoint — the Bulk API endpoint that accepts SOQL statements and returns Opportunity records in batches. Custom __c fields are included automatically; no per-object connector configuration is needed.
Step 2: Ingesting the Opportunity table into Snowflake
With the endpoint confirmed, DataStori generates the full pipeline configuration: OAuth 2.0 authentication, SOQL query parameters, Bulk API pagination, incremental tracking on SystemModstamp, and primary-key deduplication on every run. You review and confirm — no pipeline code is written.
- Connect Salesforce over OAuth 2.0. DataStori auto-detects the grant flow (Client Credentials for unattended runs). Enter your Connected App credentials and test the connection.
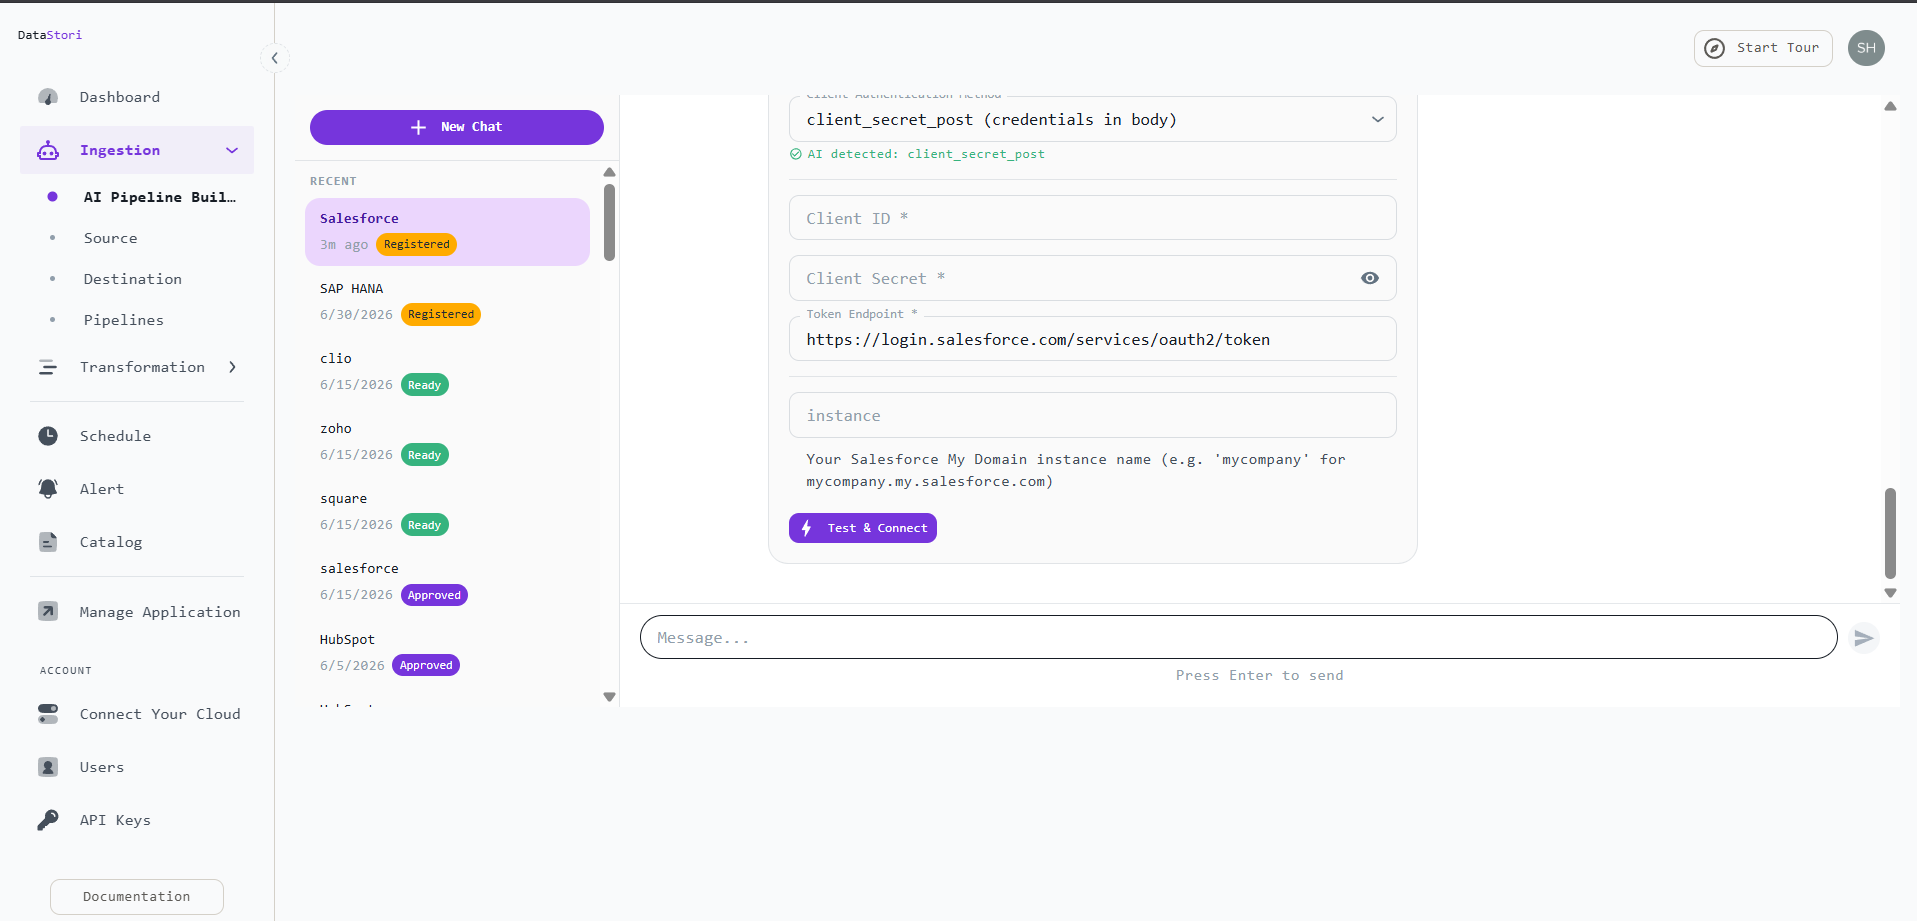
Authorize over OAuth 2.0 and verify the connection before proceeding. - Review the generated configuration. Confirm the SOQL query, Bulk API pagination, API host, and incremental cursor the agent proposed, then create the pipeline. Schema is documented automatically.
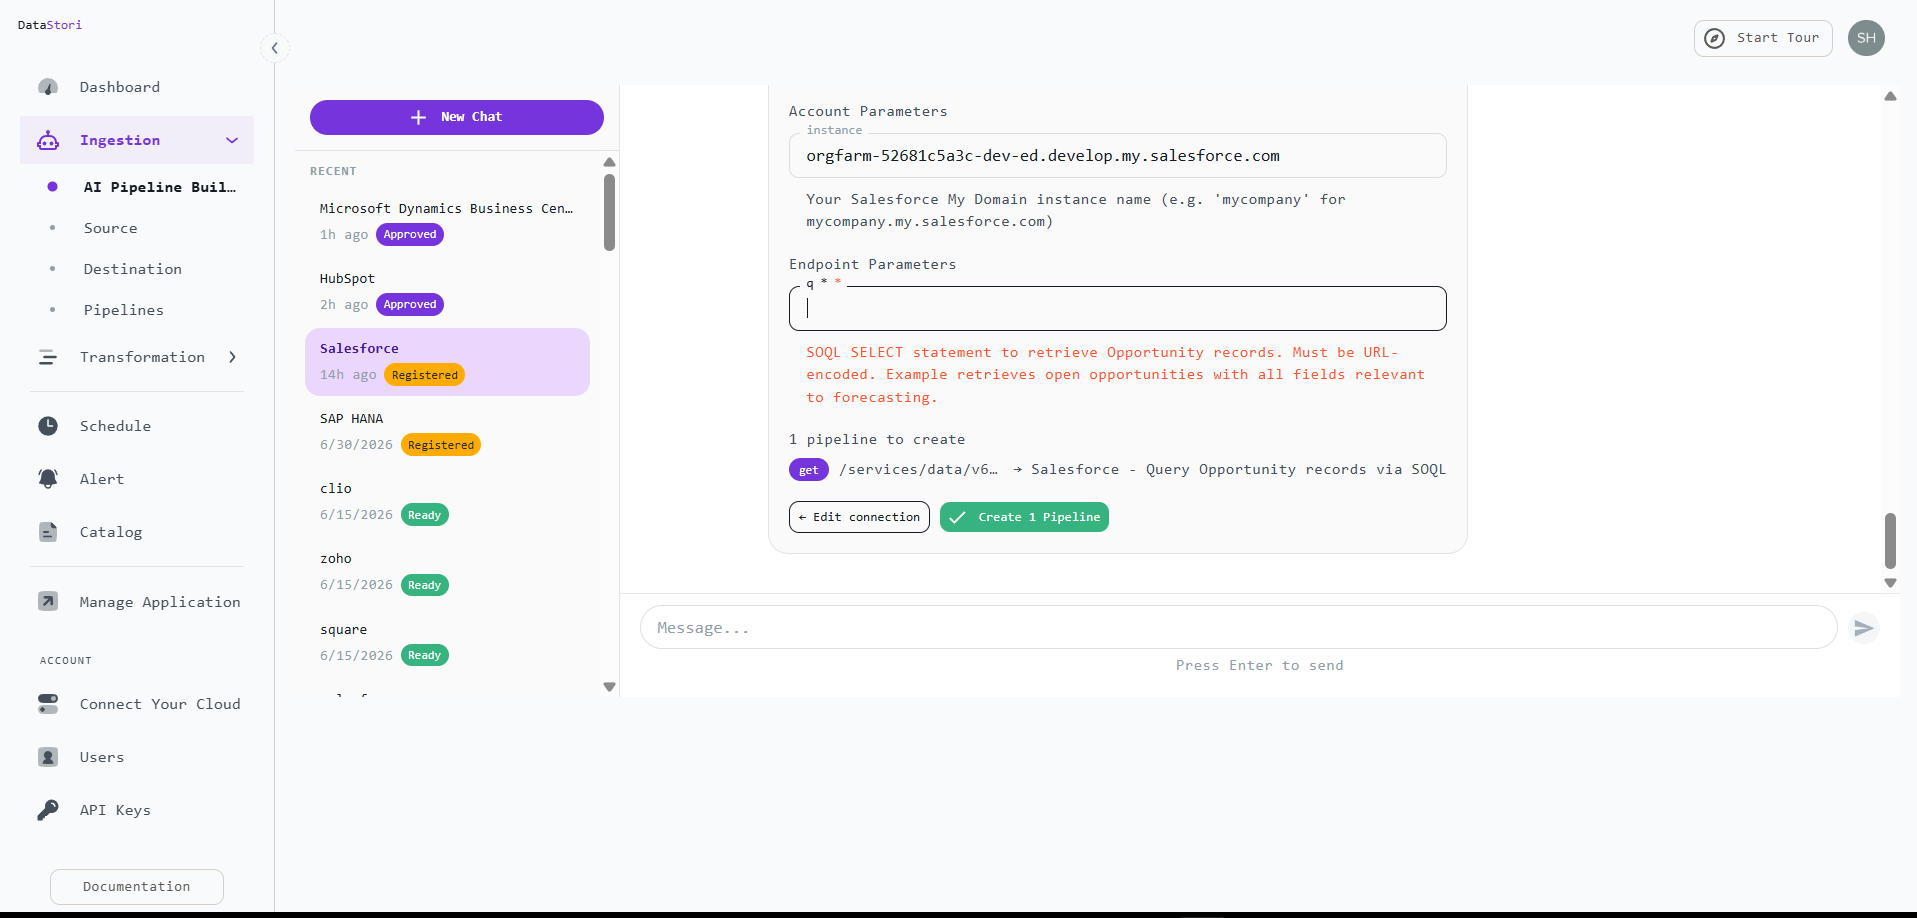
Review the generated pipeline configuration — SOQL query, pagination, incremental cursor — then create it. - Run and schedule. Trigger a run or put it on a schedule. Extraction, deduplication on the primary key, and incremental tracking all happen automatically — with schema evolution and data-quality checks (freshness, primary-key not-null, uniqueness) on every run.
- Run and schedule. Trigger an initial full load or put the pipeline on a recurring schedule. Incremental runs filter on
SystemModstamp, deduplicating on the primary key and capturing soft-deleted records viaqueryAll.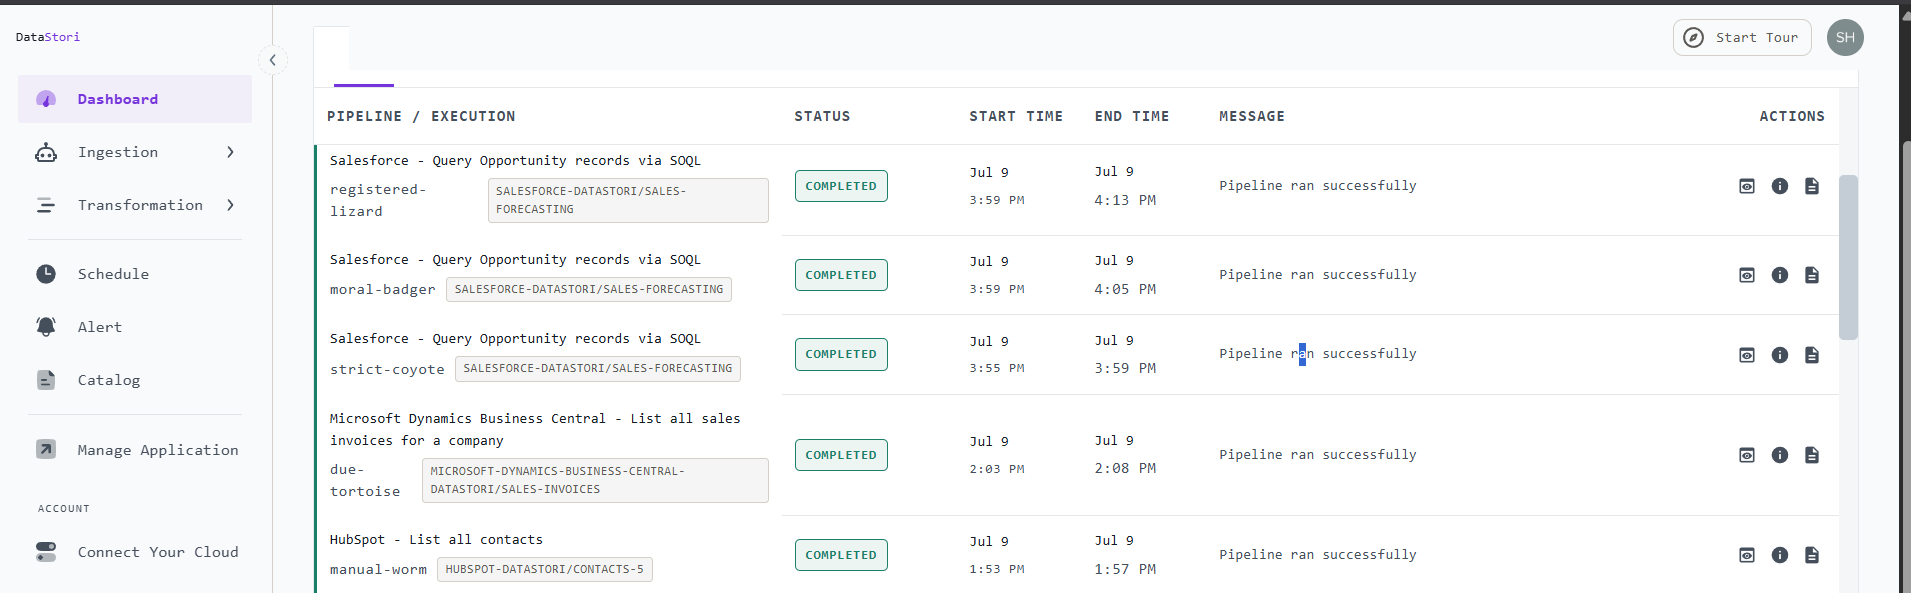
Runs complete automatically. Status, duration, and row counts are visible on the dashboard.
Data lands in your choice of format: Delta (default), Iceberg, Parquet, or CSV. Because pipelines execute in your cloud, your data never leaves your environment and DataStori only ever sees pipeline metadata.
Pipelines run entirely in your own cloud. Salesforce data moves directly to your Snowflake destination; DataStori orchestrates the run and stores only pipeline metadata — your business data never passes through DataStori's servers.
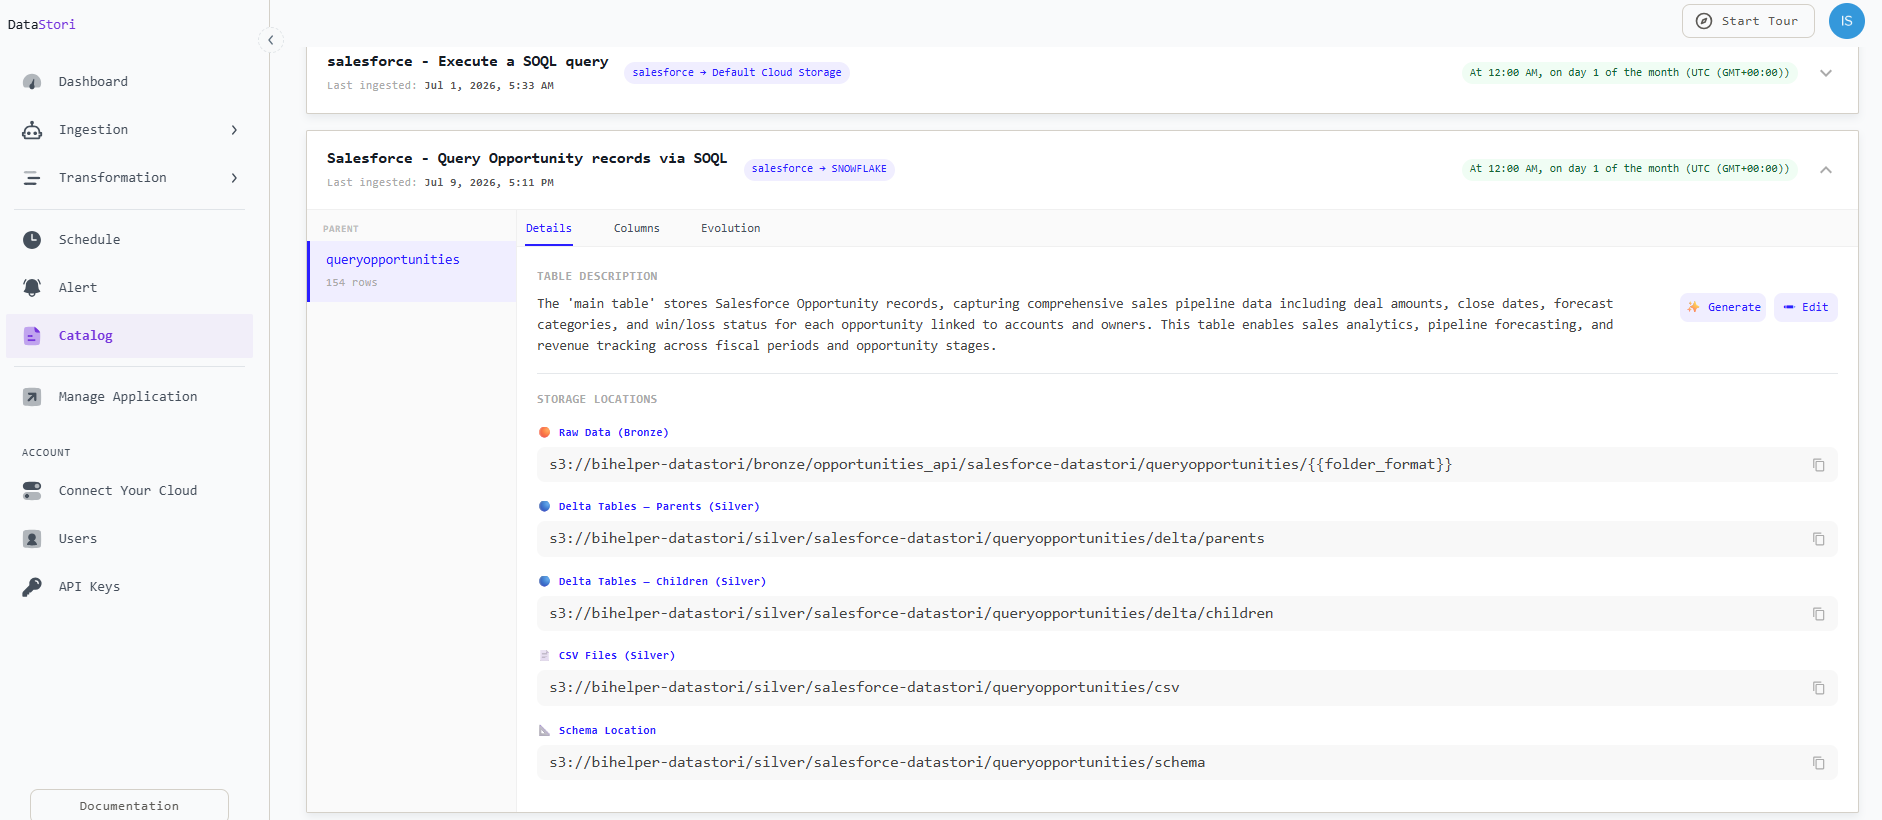
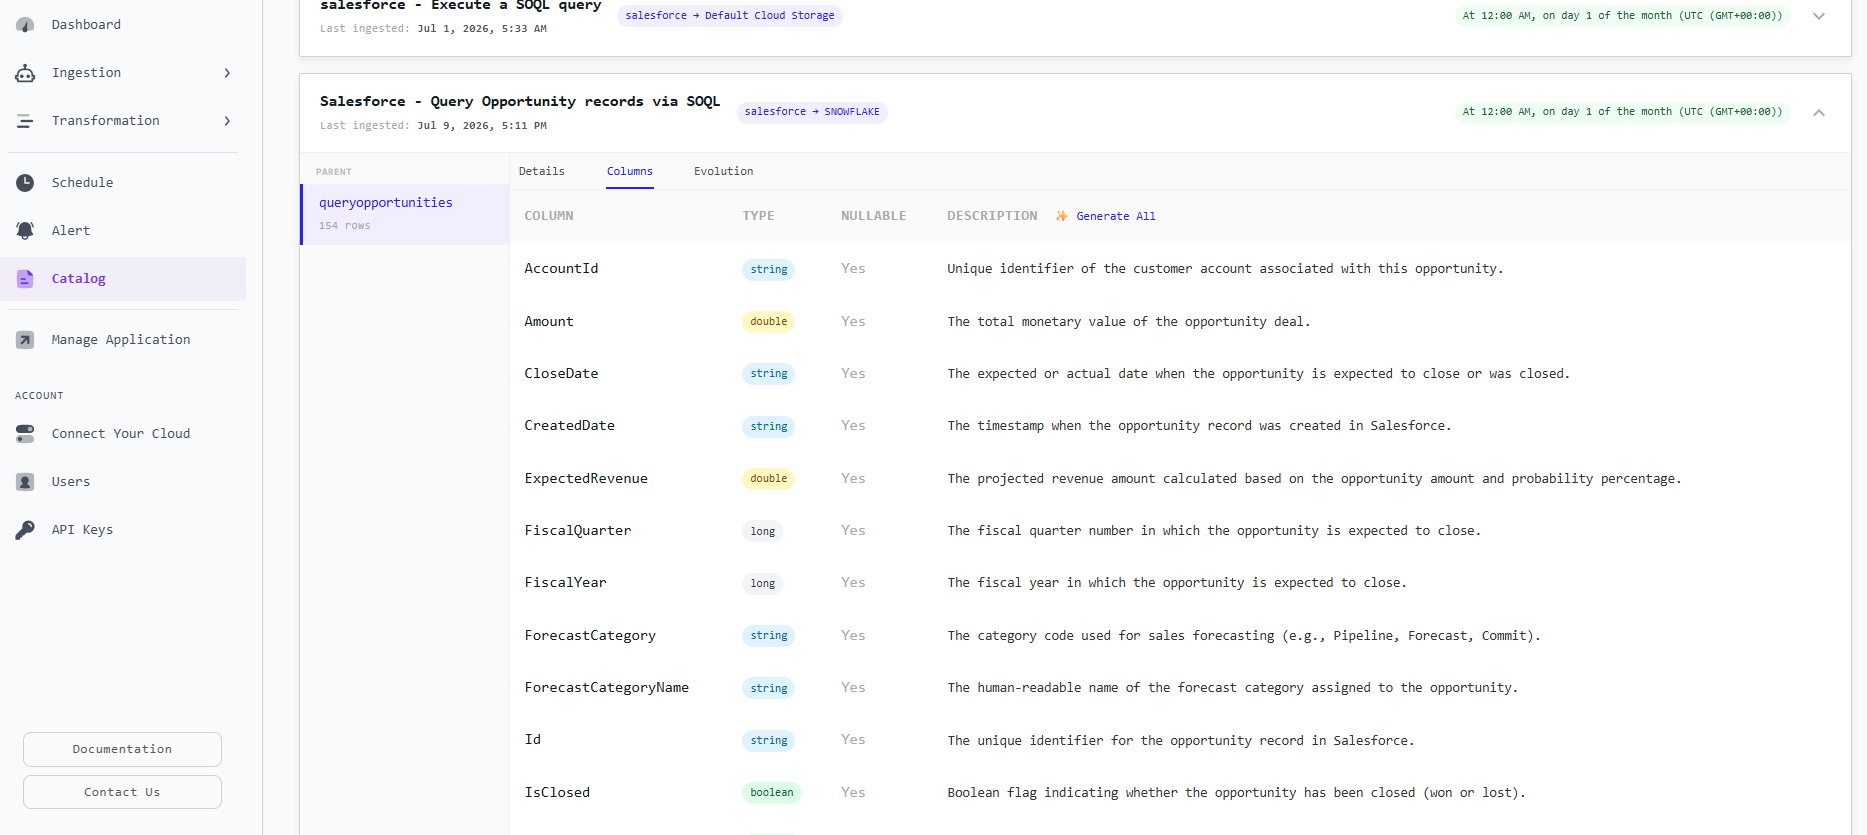
Step 3: Data catalog — Opportunity table auto-documented in DataStori
Once the first run completes, the Opportunity table is available in Snowflake with its schema automatically documented by DataStori. Standard fields — Id, Name, Amount, StageName, CloseDate, ExpectedRevenue — and any custom __c fields are all present, deduplicated on the primary key and ready for the transformation step. See how DataStori handles schema evolution when Salesforce adds or renames fields between runs.
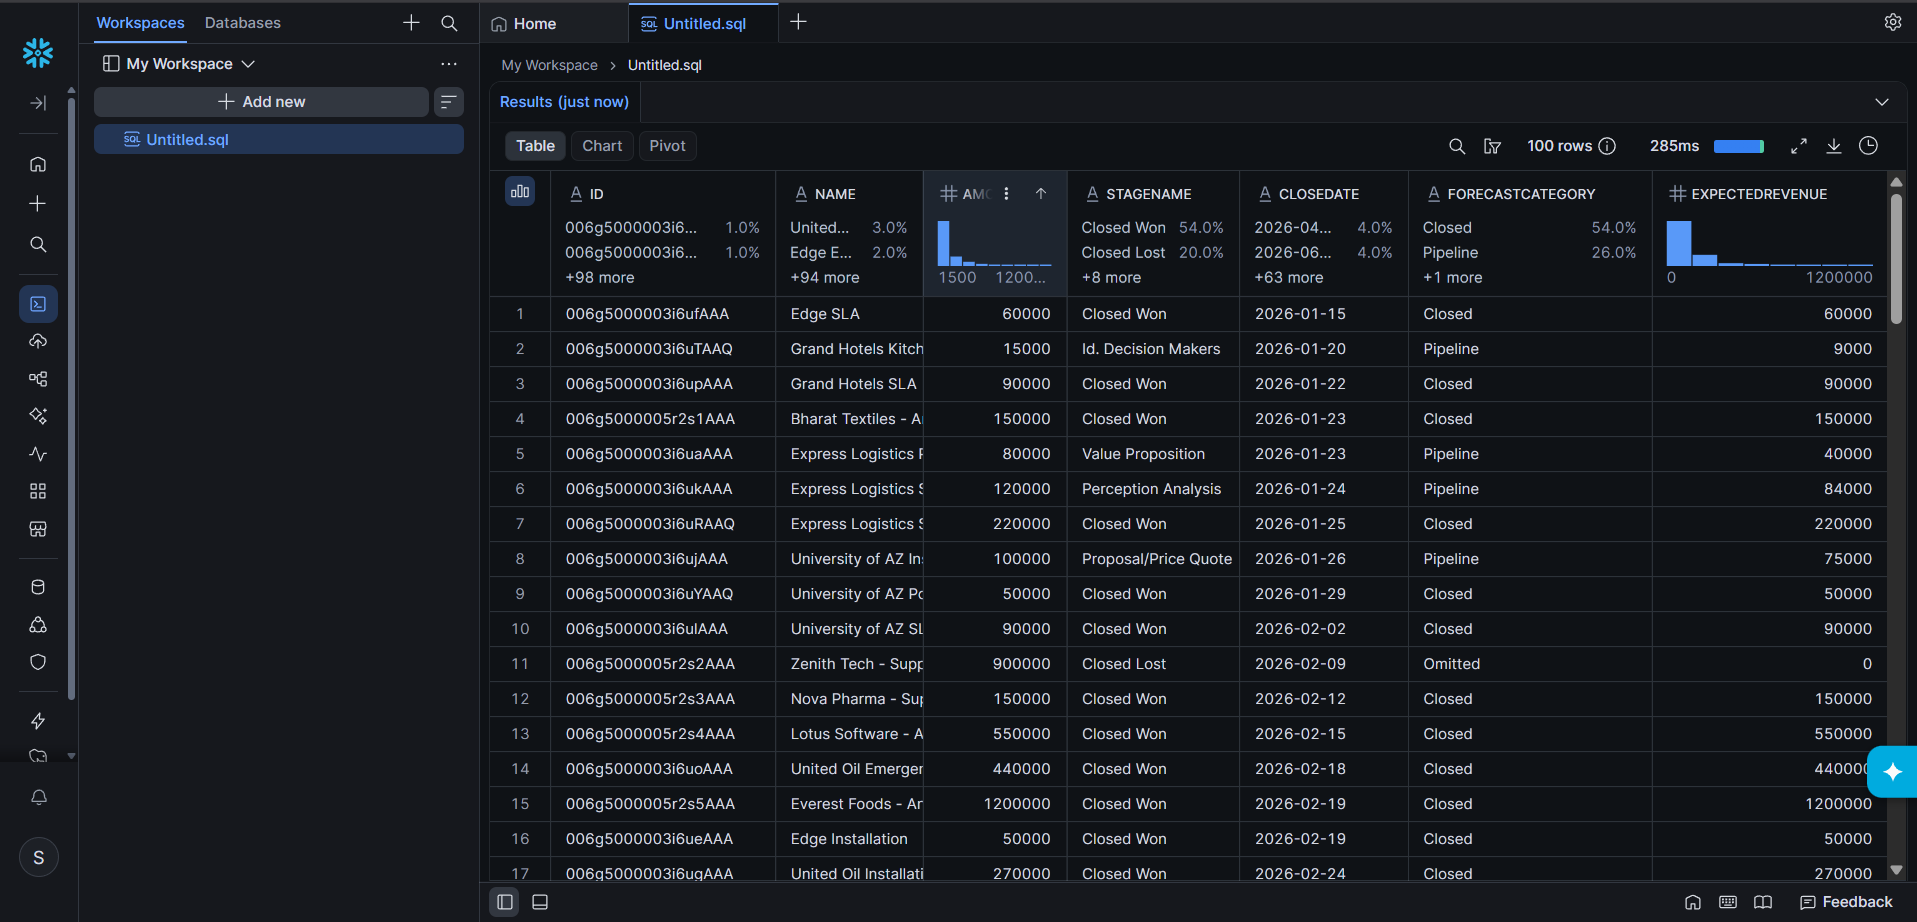
Step 4: Running the tier distribution and outlier detection transformations
4.1 — Define the data model
Before running any transformation, navigate to DataStori's data model window. This is where you define the relationships between your ingested tables and the metrics you want to compute. For a Salesforce-only analysis the Opportunity table is the single source, but if you want to join it with data from other sources — a CRM, a billing system, a product database — this is the right place to build those joins. The data model you define here acts as the semantic layer that the automated transformation in step 4.2 reads from, so the output is grounded in relationships you control rather than assumptions the system makes on its own.
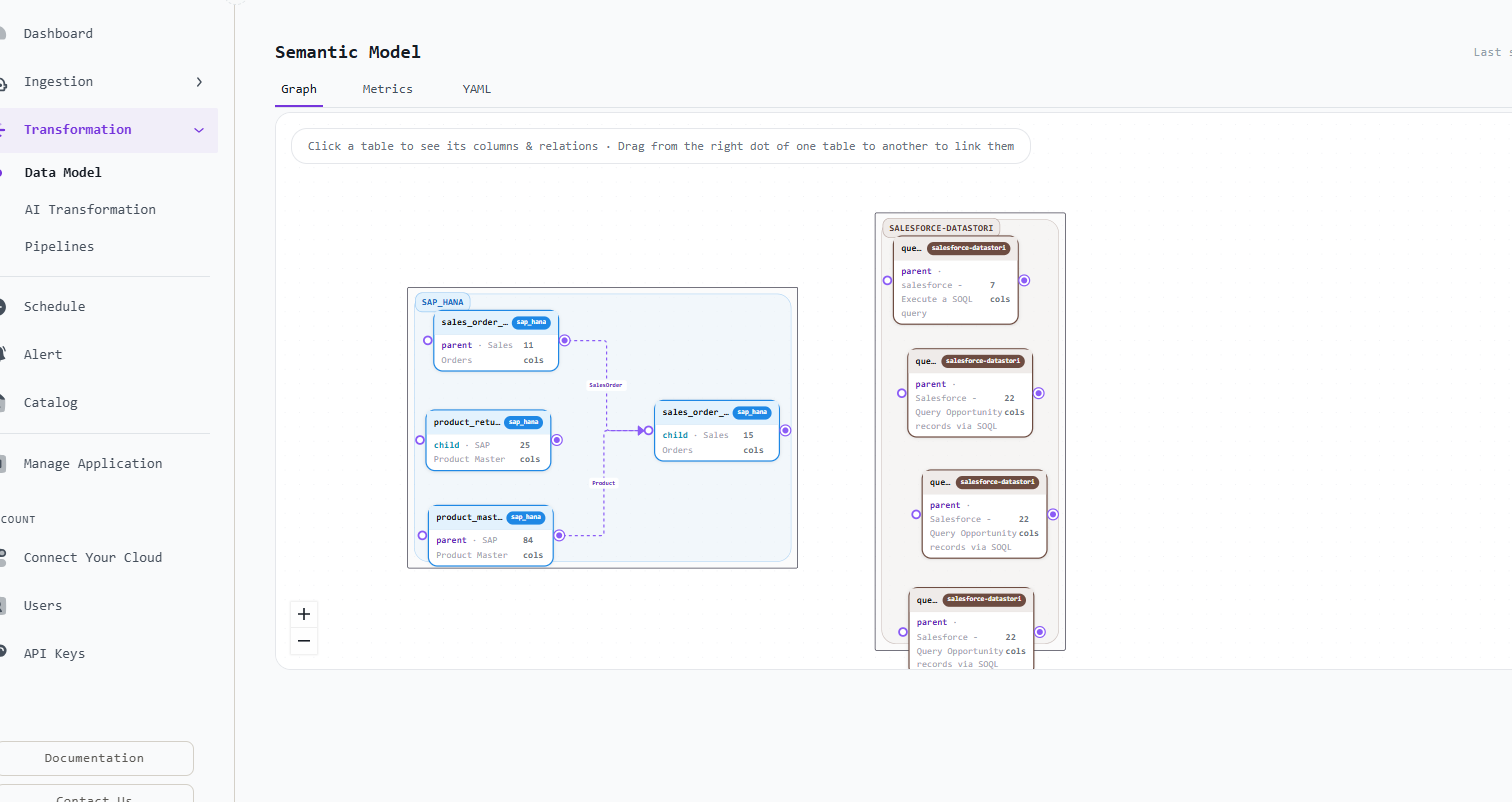
4.2 — Run the automated transformation
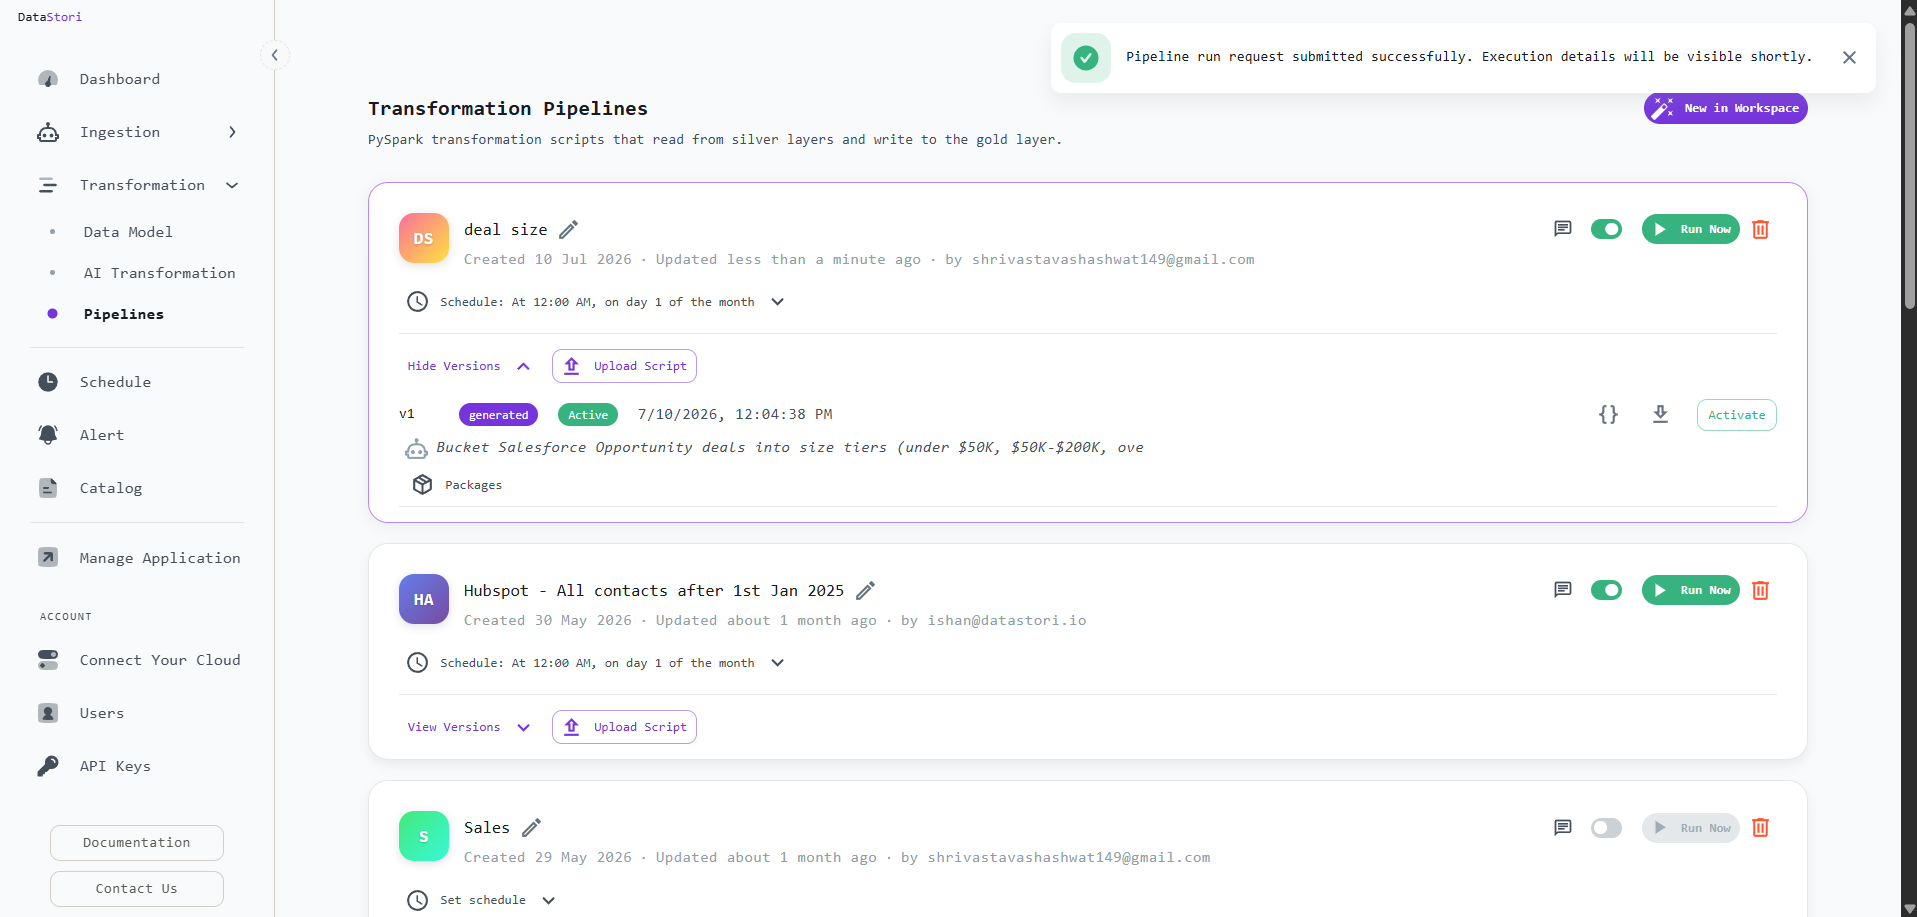
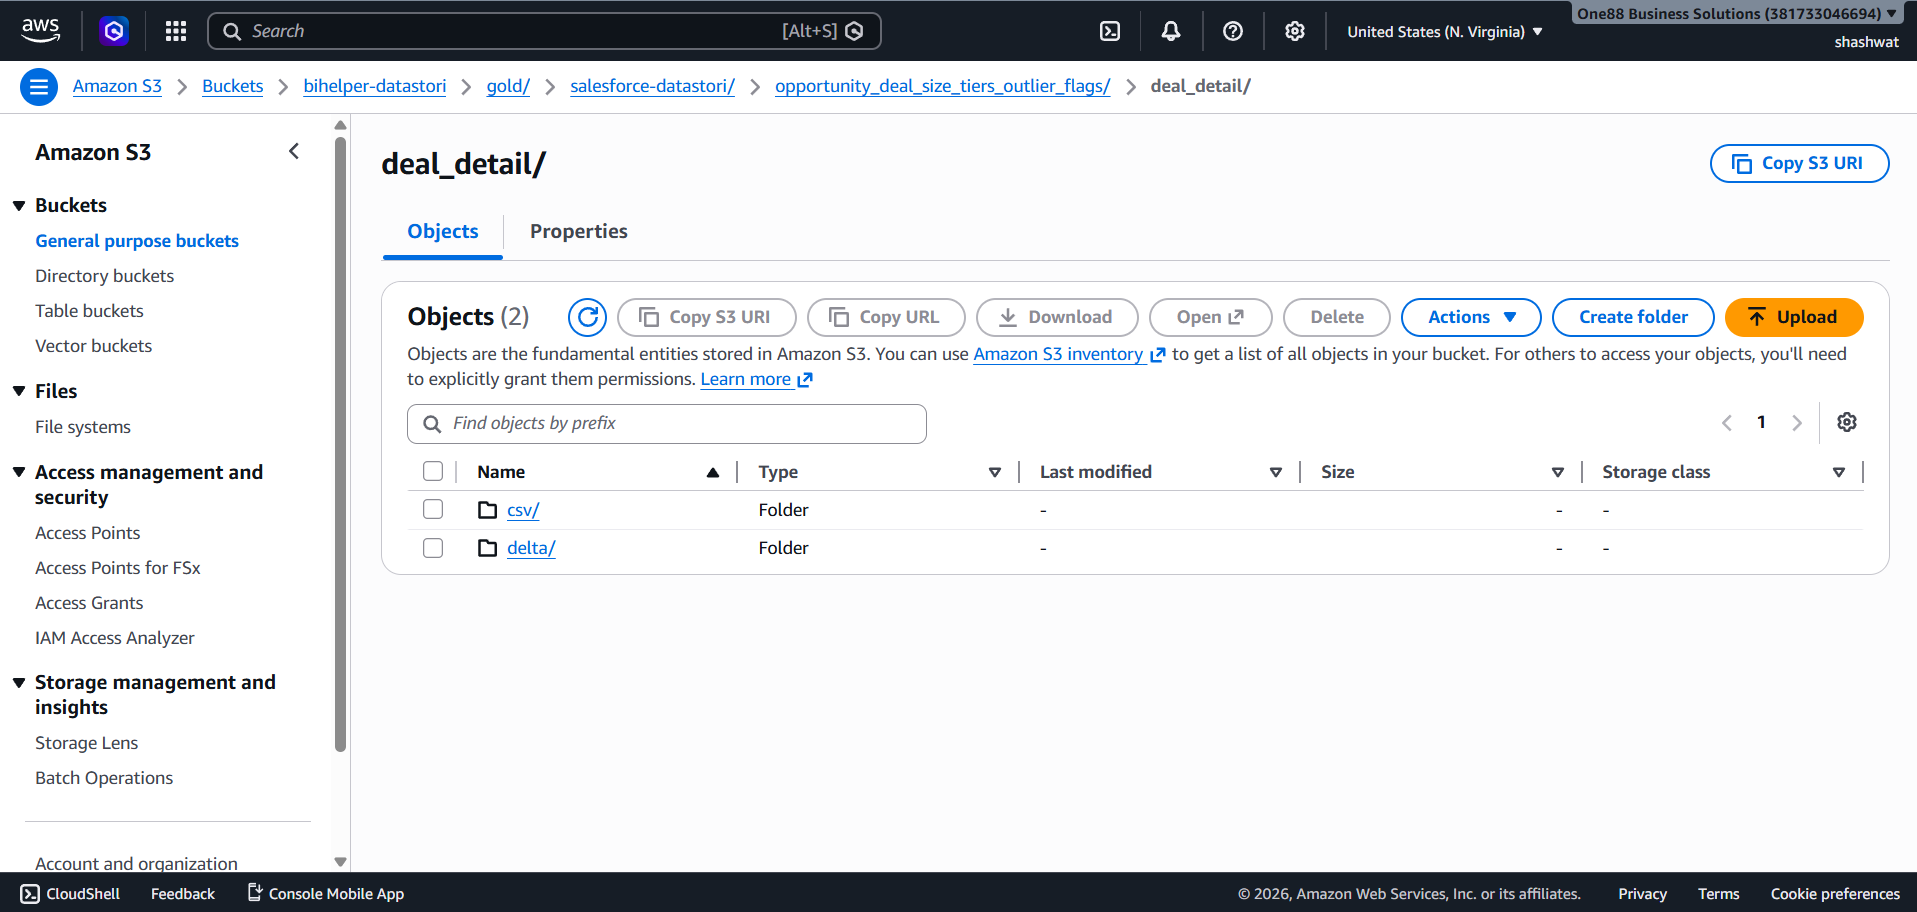
With the data model in place, open the Transformation Workspace and describe the computation in plain language. DataStori reads the data catalog and the data model, identifies the Opportunity table and its columns, and generates a complete PySpark script that computes deal-size tiers and outlier flags, then writes both Delta and CSV output to the gold layer of your own cloud storage.
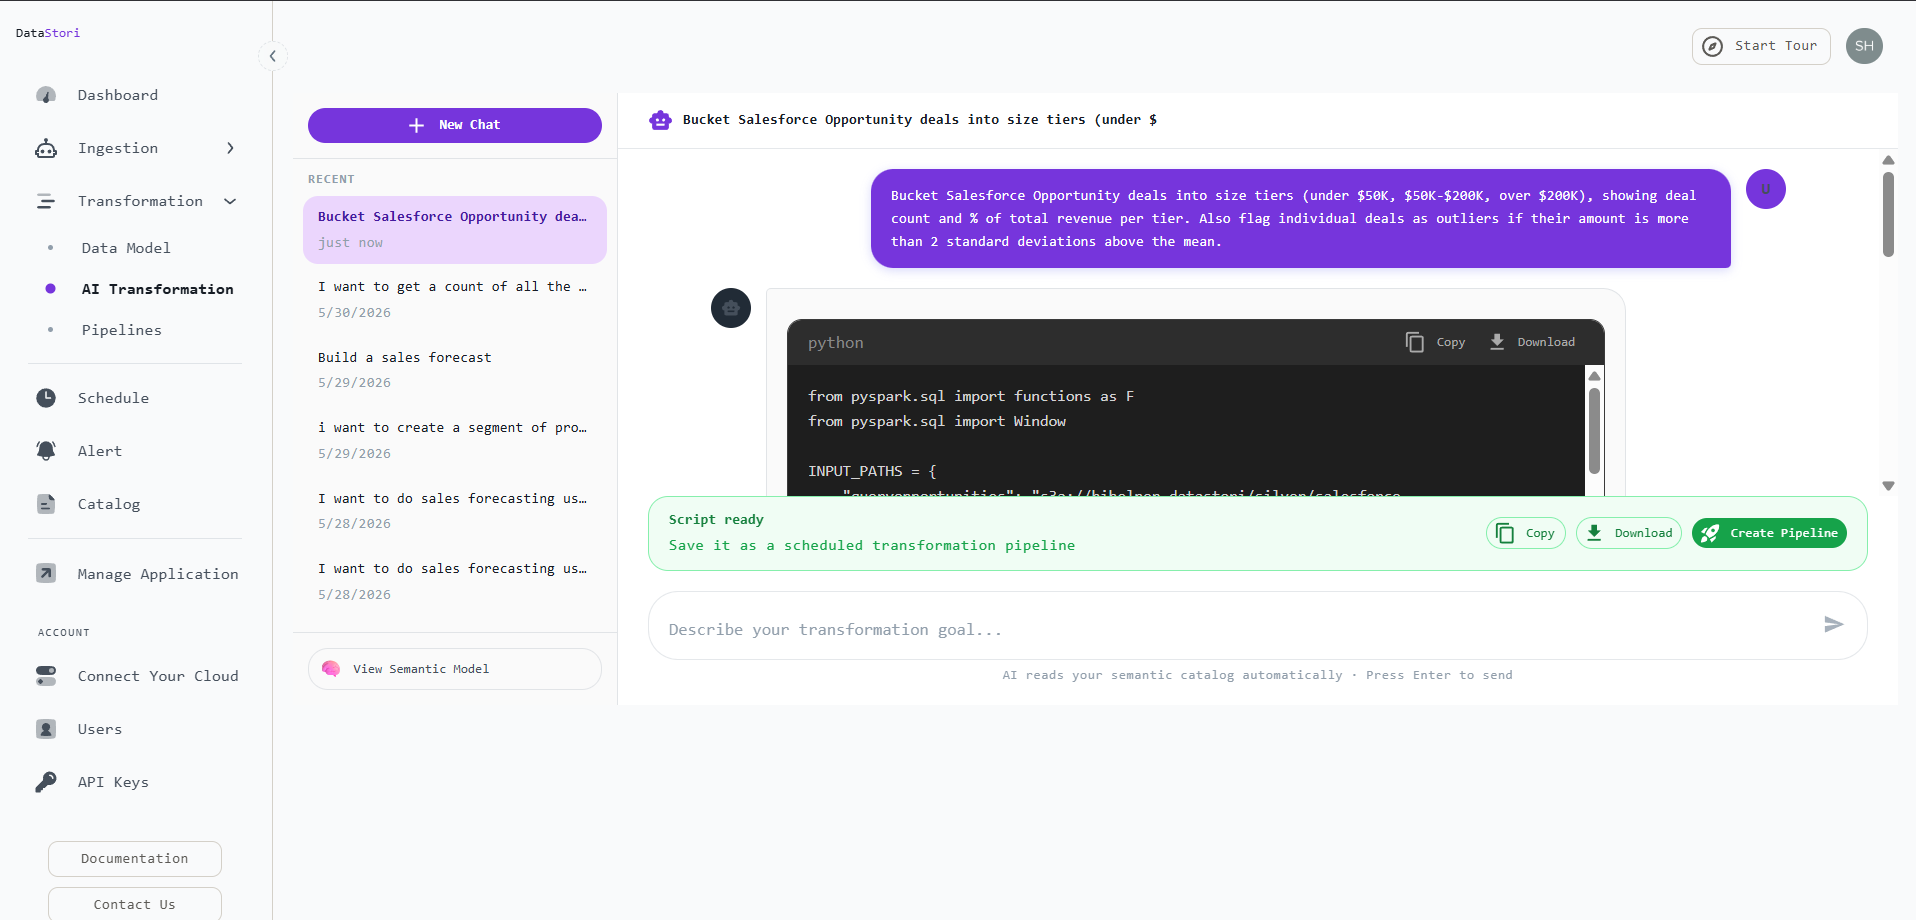
Name the transformation and save it. DataStori stores the script as a versioned artifact and registers it as a schedulable pipeline in the Transformation Catalog alongside your ingestion pipelines.
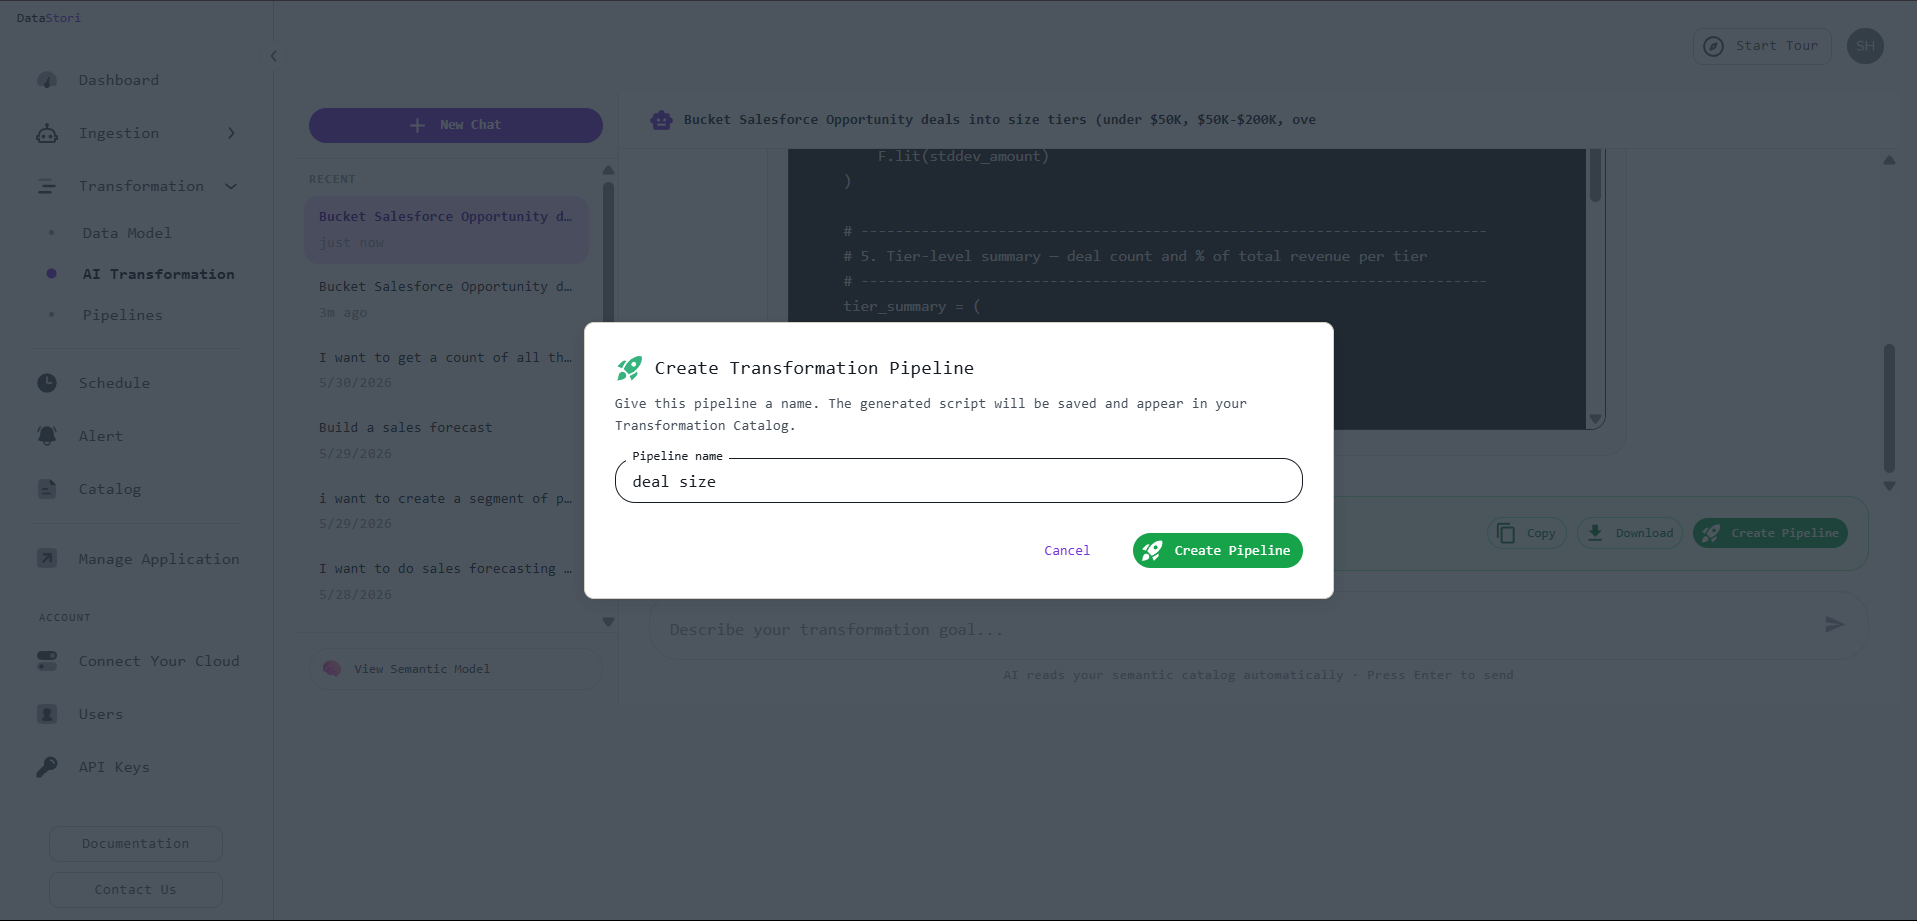

Because transformations run in your cloud, output lands in the gold layer of your cloud storage — Delta format for downstream pipelines, CSV for direct inspection — next to the Salesforce silver data it read from.
The CSV contains each Opportunity row tagged with its deal-size tier, an is_outlier flag, and the mean and standard deviation used to compute it. You can push this data to snowflake or consume it directly from your cloud storage.

Aggregating the row-level output produces the two target tables from the problem statement:
Frequently Asked Questions
Does DataStori support Salesforce custom objects?
Yes. DataStori auto-discovers objects and fields from your Salesforce org, including custom objects and fields (the ones ending in __c). You do not need a pre-built connector for each object.
How are Salesforce updates and deletes handled in Snowflake?
Incremental runs filter on SystemModstamp to capture new and changed records, and use the queryAll operation to capture soft-deleted records. DataStori deduplicates on the primary key so your Snowflake tables reflect the current state without duplicates.
Does my Salesforce data pass through DataStori's servers?
No. Pipelines run entirely in your own cloud. Salesforce data moves directly to your Snowflake destination. DataStori orchestrates the pipeline and can only access metadata, never the business data itself.
Can DataStori handle large Salesforce volumes and API limits?
Yes. High-volume objects are extracted through the Salesforce Bulk API, which is built for large data volumes and avoids the per-page limits of the synchronous REST API.
What Snowflake data formats does DataStori deliver?
Data lands in Delta (the default), Iceberg, Parquet, or CSV, in your own cloud storage and Snowflake. Data volume is unlimited on every plan.